How to Get Started with Brainstack: A Beginner’s Guide
Welcome to Brainstack.
If you're someone who constantly has ideas, reflections, half-formed plans, or breakthrough moments—this tool was built for you.
Brainstack helps you capture your thinking fast, and lay it out visually in a way that makes sense to your brain.
No clutter. No structure to master. Just space to think.
We’re early in our journey—thanks for being here.
For now, we’re a simple notes app. Soon, we’ll be cognitive infrastructure.
Sign up to hear what’s next →
What is Brainstack?
Brainstack is a lightweight, desktop-first thinking tool.
You drop in text-based thoughts. The app saves them instantly and lets you arrange them spatially—on a whiteboard that feels more like a mind map than a filing system.
You can:
- Write down anything—ideas, to-dos, notes, questions
- Revisit past thoughts in your History panel
- Display any note and move it around on your whiteboard
- Cluster related thoughts visually, however works best for you
There’s no right way. Just your way.
Here's a quick video to take you through the basics and there are steps below too.
Enjoy creating your Brainstack!
Step 1: Sign In or Create an Account
Go to brainstack.me and click Sign In (top right).
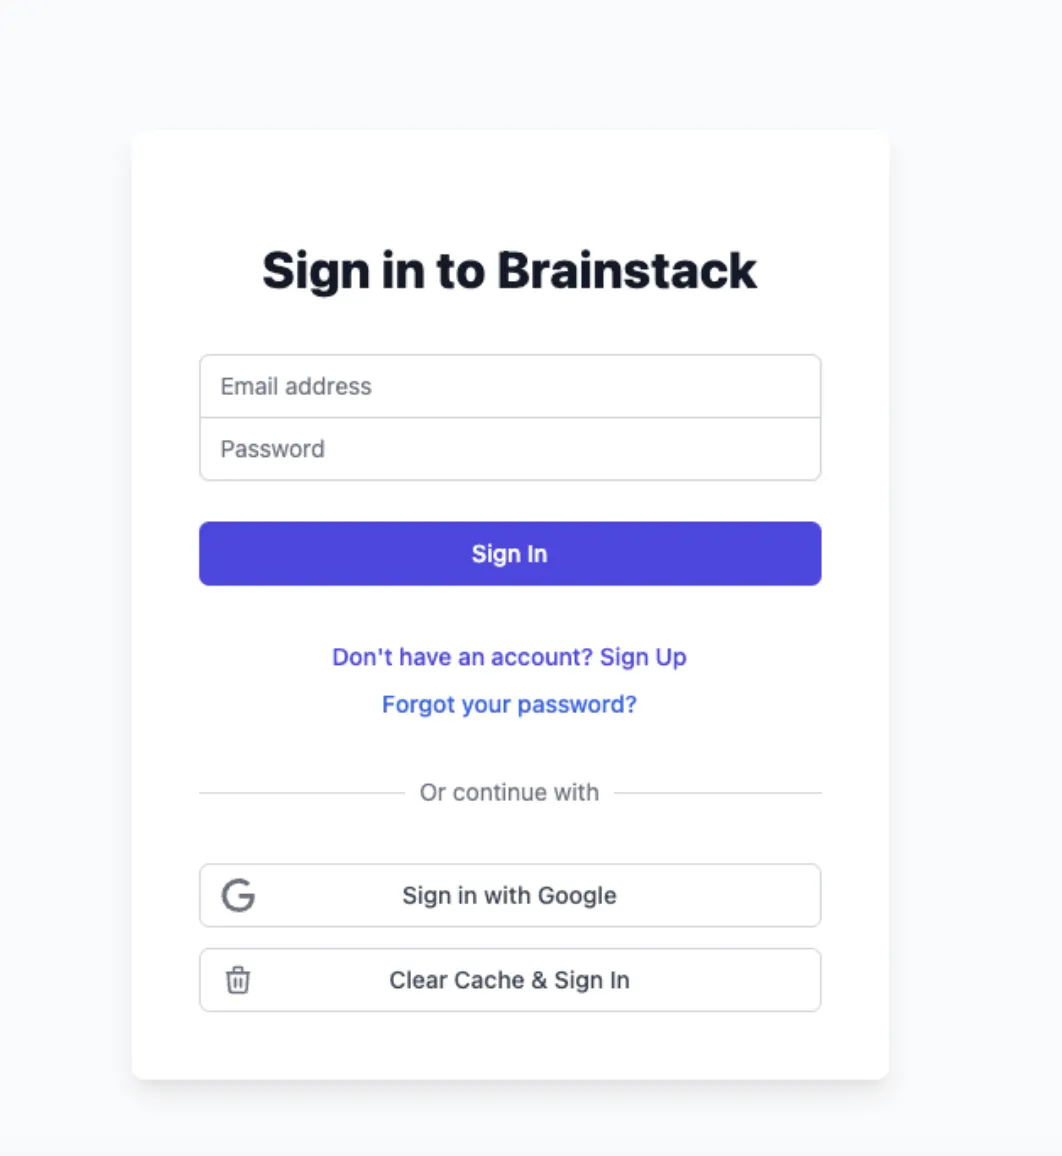
If you're new, click Sign Up to create an account.
Otherwise, if you already have a Brainstack account, enter your email and password or use Sign in with Google.
Once you're in, click Go to Whiteboard to start.
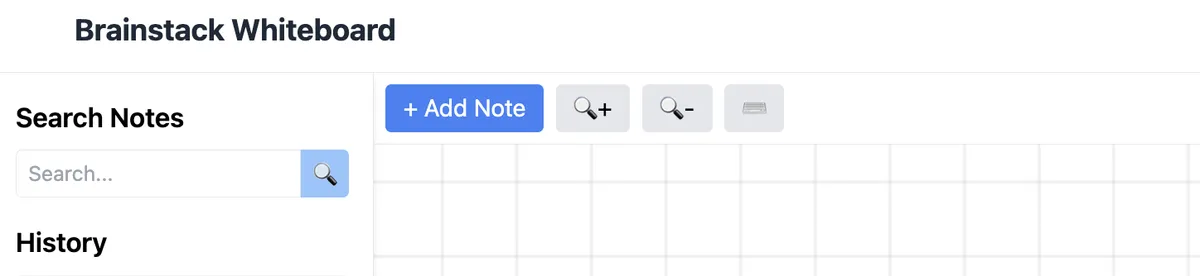
Step 2: Add Your First Thought
Click the blue + Add Note button in the toolbar. A blank note will appear on your whiteboard. Just type.
There’s no need to overthink it. Start with:
- A question you’re sitting with
- A note from a conversation
- A reflection or insight
- Something on your to-do list
Your note autosaves every second.
Click outside the note or press Ctrl + Enter to confirm.
Step 3: Keep Capturing. Nothing Gets Lost.
Every thought you write is saved instantly to your History, located on the left.
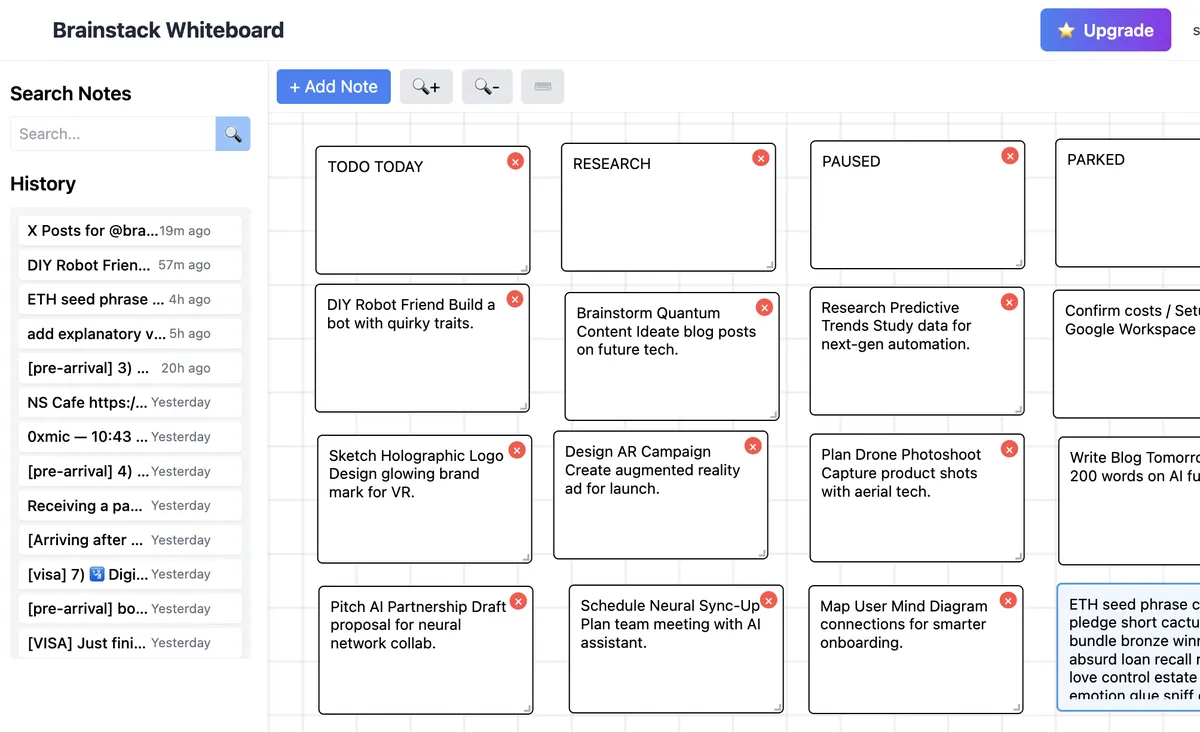
From there, you can:
- Scroll back through anything you’ve written
- Search for a keyword or topic
- Click a past note to display on your whiteboard
Step 4: Arrange Notes Visually
Click any note in your History to display it. Then move it anywhere on the whiteboard.
Organise your thinking by:
- Clustering related thoughts
- Laying out steps in a project
- Zooming out to spot patterns
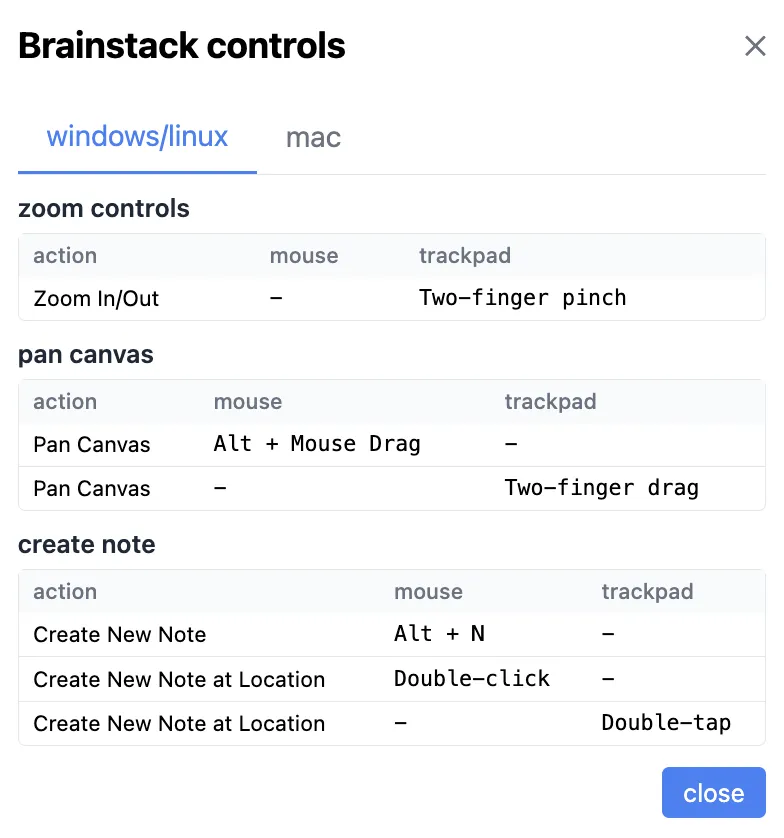
To move around the board:
- On PC: hold Alt + Mouse and drag
- On Mac: use Option + Mouse Click & Drag
Step 5: Zoom and Reset the View
Use the toolbar to adjust your view:
- + Zoom in
- – Zoom out
Step 6: Use Shortcuts to Move Faster
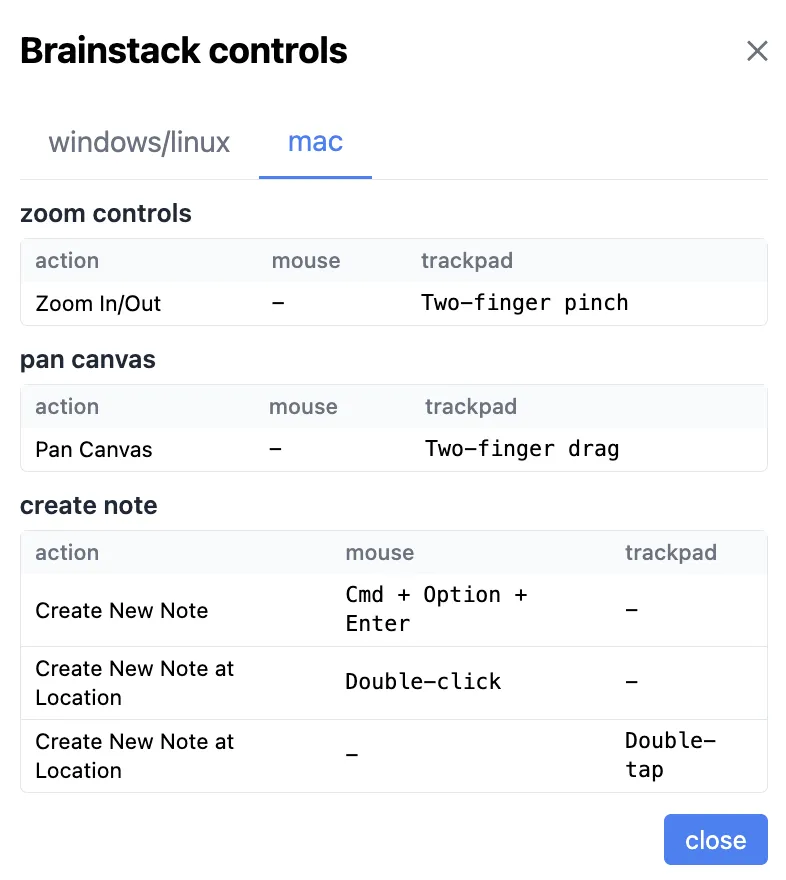
Click the keyboard icon next to Zoom controls to see all available shortcuts.
Useful PC shortcuts:
- Alt + Mouse — drag the whiteboard
- Alt + N — create a new note
Useful Mac (trackpad) shortcuts:
- Two-finger drag — moves the whiteboard
- Double tap — Create New Note at Location
Step 7: Delete a Note from the Whiteboard
Want to remove something from view?
- Click the note in History
- It’ll appear on the whiteboard
- Click the red X in the corner of the note to remove it
The note stays saved in your History.
Step 8: Delete a Note from the History
Want to delete a note?
- Hover over the note in History
- Look for the trashcan to the right of the note
- Click the trashcan
- Click 'Confirm?'
The note is removed from your History.
Step 9: Share Feedback
Click the blue Feedback button on the right-hand side of the screen.
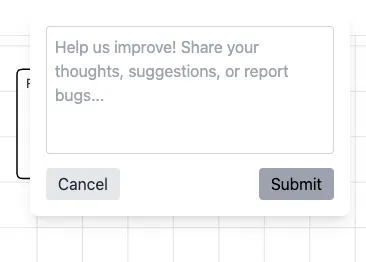
Use it to:
- Report bugs
- Share feature requests
- Let us know what’s working for you
Thank you! All feedback is valued by the Brainstack team.
Step 10: Skip These (For Now)
You might see:
- The full History sidebar evolving
- A feature called Mind Meld (AI-assisted grouping)
They’re in development. No need to explore them just yet—we’ll let you know when they’re ready.
Bonus 1: Add Notes from Your Phone (Sort of)
We’re desktop-first at the moment. You can still bring ideas across from your phone:
- Take a photo of your journal, sticky note or whiteboard
- Use your phone’s text recognition (like iPhone Live Text or Google Lens)
- Copy and paste that text into Brainstack on your desktop
Fast. Lo-fi. It works.
Bonus 2: (On iPhone) Setup Apple Shortcut to Add Notes from Your Phone
Ever setup an Apple Shortcut so you can share links and useful text from online sites? Shortcuts can save a lot of time. Here's how to setup:
[add video]
What’s Coming Soon
You’re here early—and helping shape what’s next. We’re working on:
- Mobile access
- Voice and image capture
- AI-powered tagging and summarising
- Sharable whiteboards
Our goal is to help you move from thought → connection → success (whatever that looks like for you).
Ready to begin?
Click + Add Note, type one thought, and let your ideas unfold.
Start here → https://brainstack.me